Linked Data 101 - Making data linkable - tutorial
This article is part of the Linked Data 101 series
Now that we’re a lot more comfortable with identifiers and predicates, let’s have a play around with some old-school CSV and give it a linked data boost with Level Up - our free online converter.
Easy-peasy upload
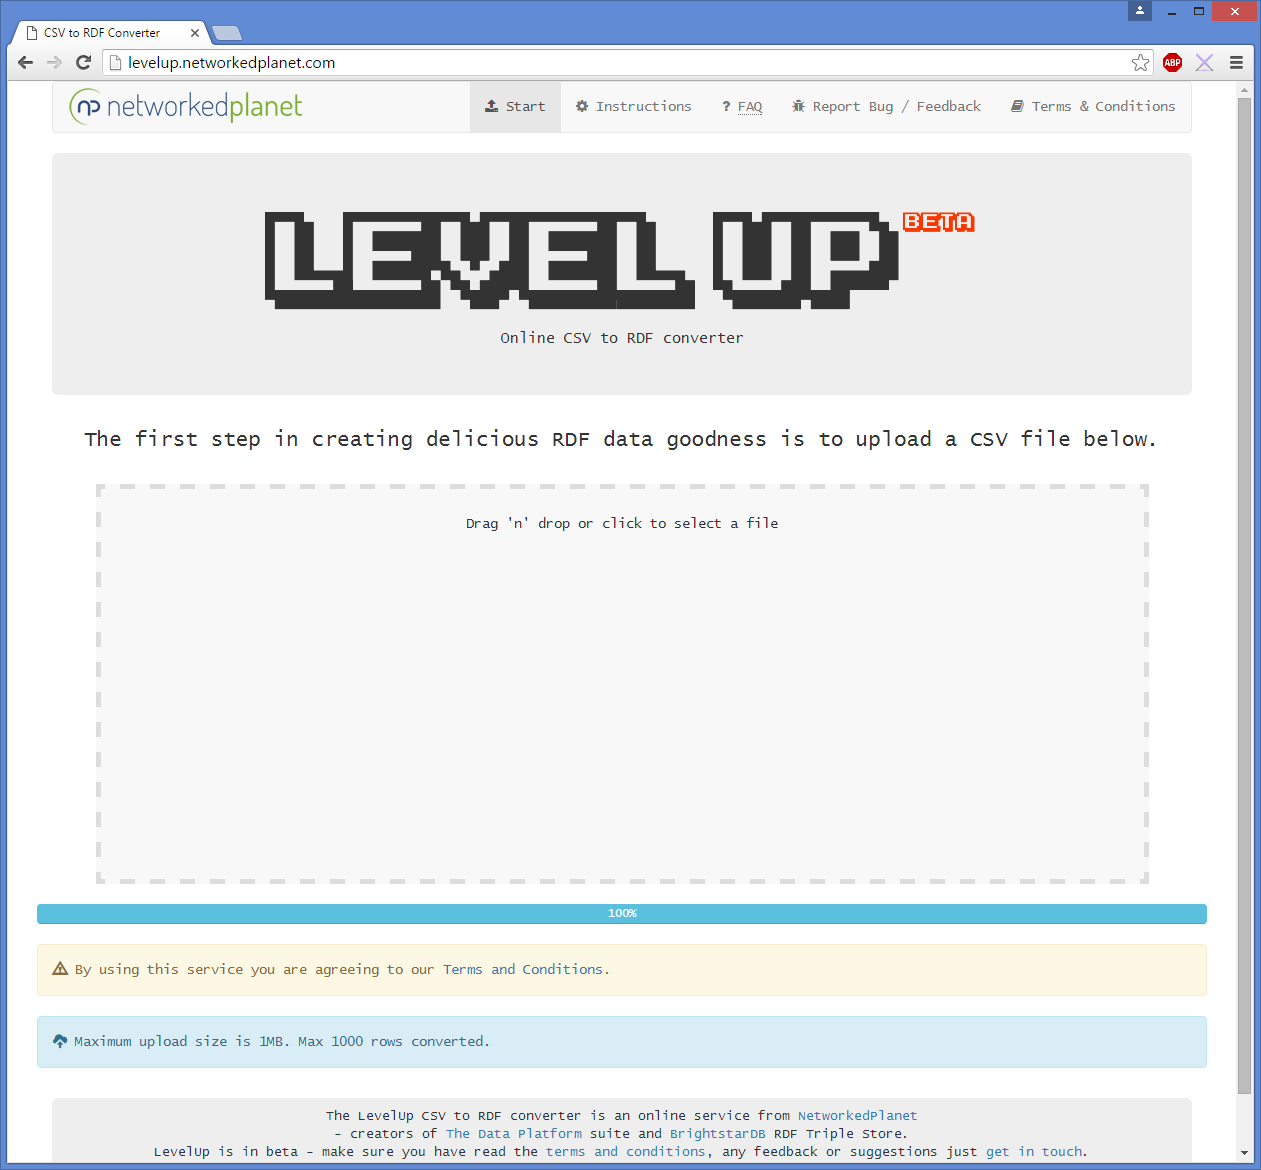
For the purpose of this walkthrough I’m going to grab a dataset from the London Datastore - the dataset I chose contains allotment details, which is published under an Open License and is in CSV format. To get started, download the dataset and open the Level Up homepage.
Uploading the CSV file is a simple case of either dragging the file into the upload area, or clicking the upload area to open a file selection window.
Default configuration
As we saw on the previous blog posts in the series, the basic steps in structuring flat data into semantic data is the use of URIs as identifiers and predicates. Level Up automatically sets up the converter with a set of URIs, so if you want to skip ahead and hit “Convert your CSV” then go for it! In the rest of this post we’ll take a look at changing those URIs to make them a bit more useful.
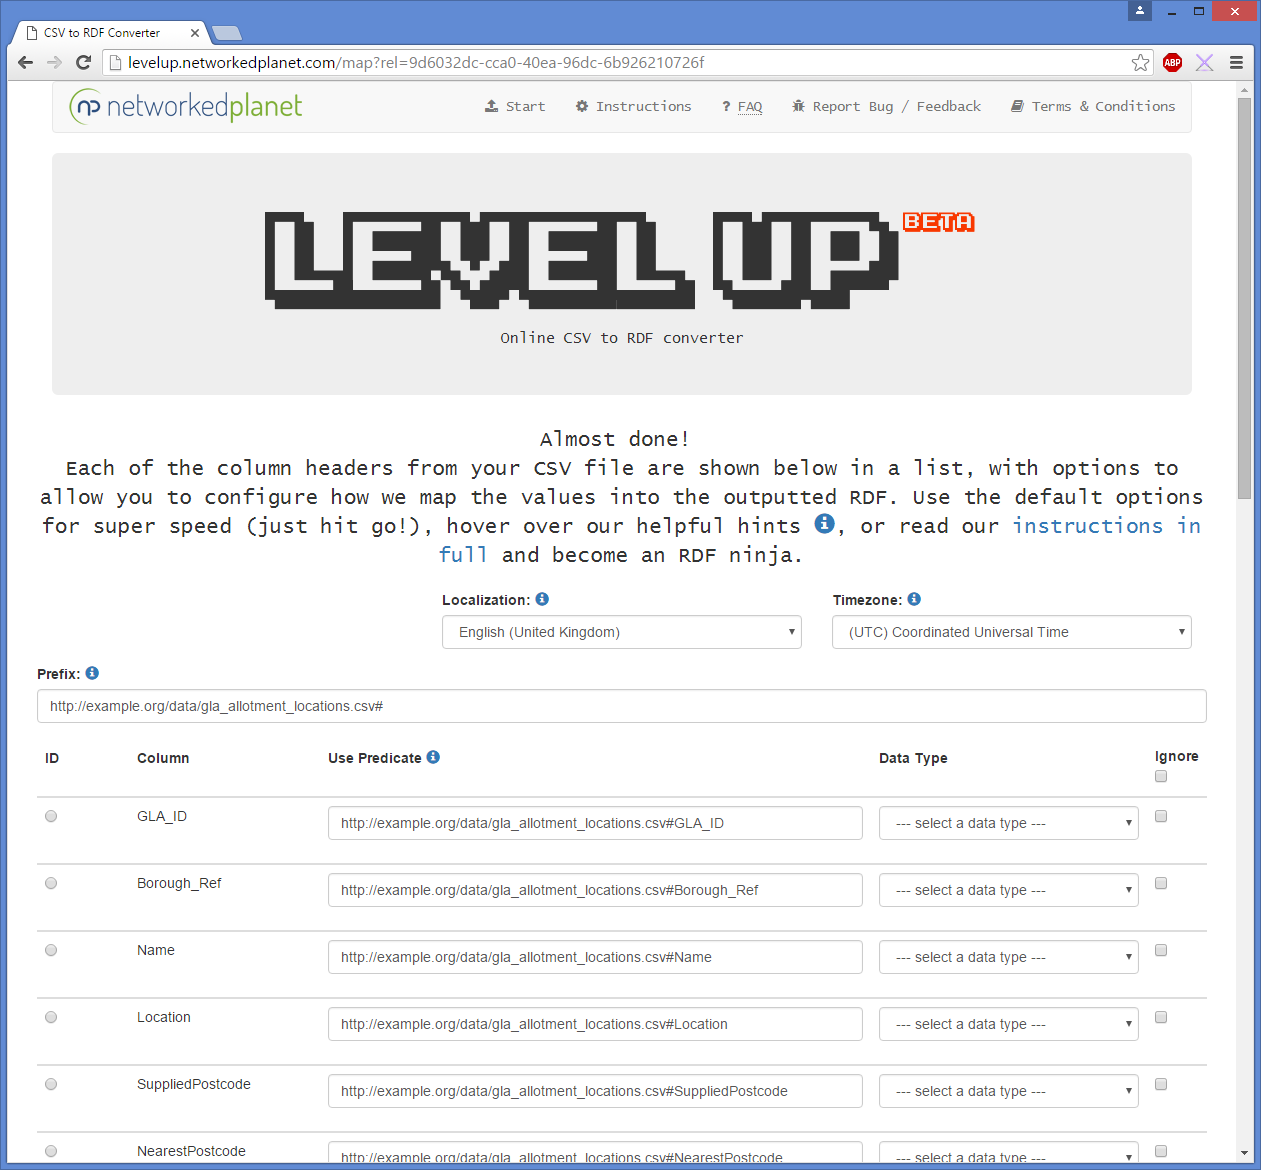
Choosing a prefix
The default prefix uses our good friend, example.org, along with the uploaded filename. Whilst useful, my data portal is going to sit on an intranet for the fictional company - contoso - so I’m going to tweak it a little so that my prefix for the predicates becomes http://data.contoso.com/environment/ontology/. As I update the prefix, all the predicate URIs and the main identifier URI are updated too.

Which column shall I use as the identifier?
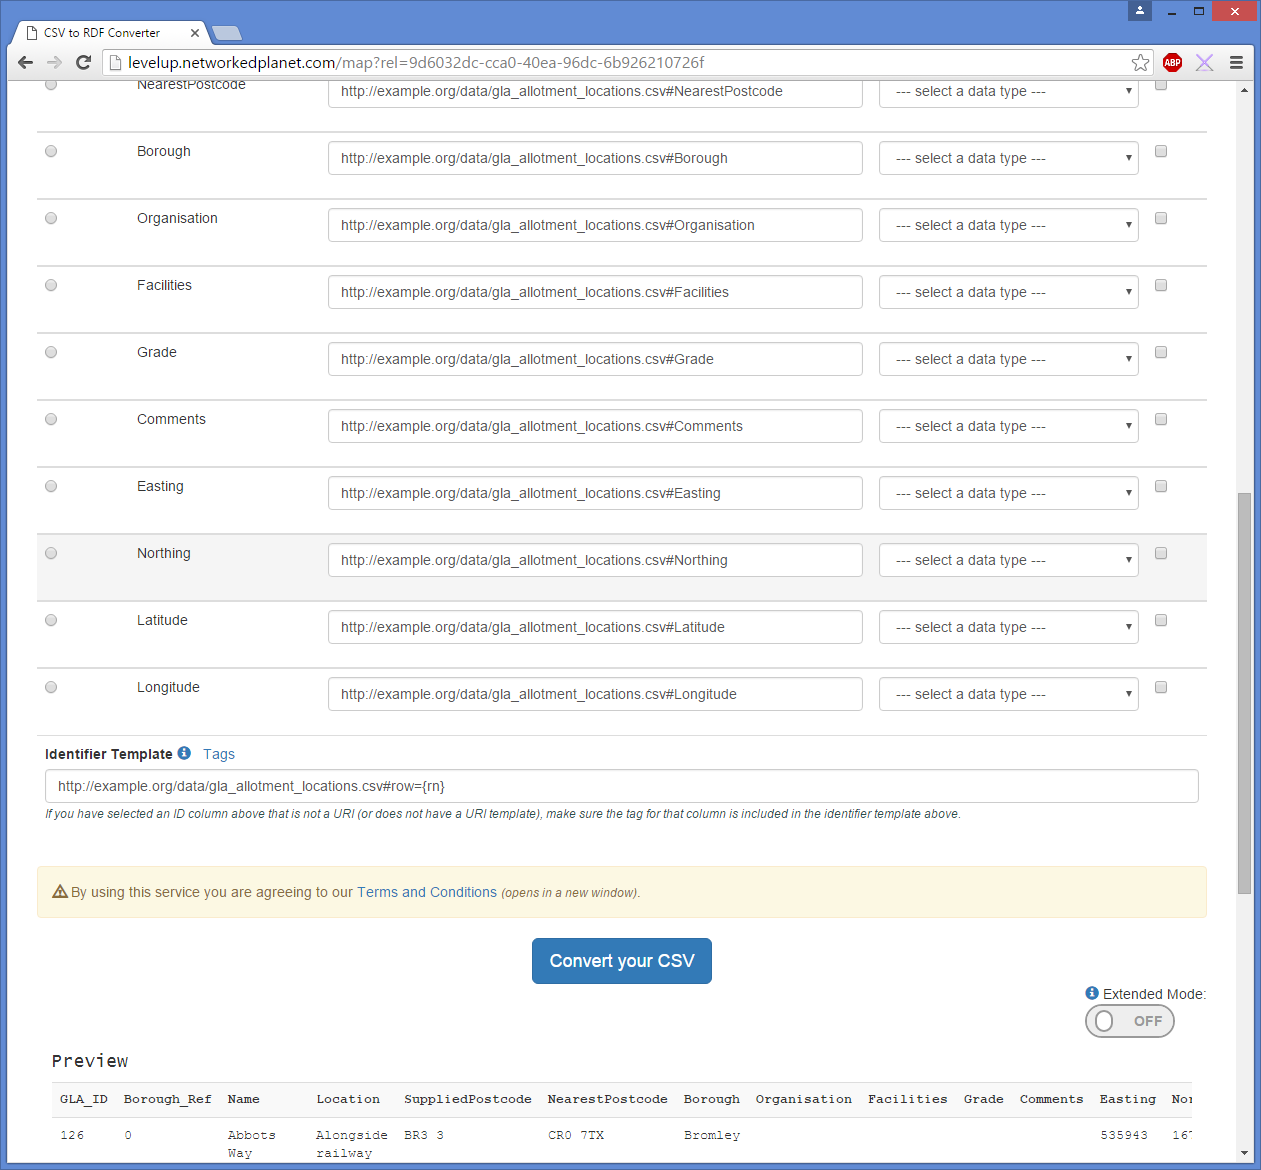
I can see from both the column name and the preview data at the bottom of the page that the GLA_ID column contains a numeric identifier for each record, so I select the “ID” radio button next to GLA_ID and as that column contains a number rather than a valid URI I scroll down to check out what my identifier template is looking like.
Currently it’s using the prefix http://data.contoso.com/environment/ontology/ and a row number tag {rn}. Firstly, I don’t want my resources to sit in the /ontology/ namespace so I change that to /allotments/, given that I want to use my ID GLA_ID I edit the template to include a tag for GLA_ID instead. To protect myself against typos I use the Tags link to show me a drop down list of all available tags and select GLA_ID, which adds it to the end of my identifier template:

Choosing predicates for columns
Now we move on to the predicates, Level Up has chosen some default predicates for me based on my prefix and the column name, but I’m going to have a quick scan through my columns and see if anything obvious jumps out at me. Here’s a list of the columns shown:
- GLA_ID
- Borough_Ref
- Name
- Location
- SuppliedPostcode
- NearestPostcode
- Borough
- Organisation
- Facilities
- Grade
- Comments
- Easting
- Northing
- Latitude
- Longitude
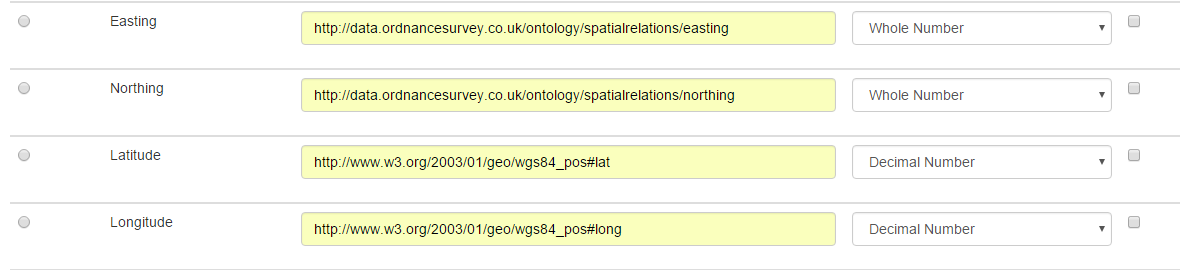
Straight off I can see that we can use the Basic Geo Vocab for the lat/long values, and the OS Spatial Relations Ontology for the easting and northing values. Let’s pop those in, and set their data types to whole number for easting/northing values and decimal number for latitude/longitude values.
Now let’s have a look through the other columns, apologies in advance as I will jump around the list slightly rather than working top to bottom.
Name
The next “easiest” column I can see is Name. In most cases when choosing a predicate for a label or name of a Thing (when we’re not working from a specific vocabulary that defines a label predicate) we tend to choose between the RDF Schema’s “label” and Dublin Core’s “title” (or FOAF for people, group or organisation names). I believe label is more accurate than title in this case, so I’m using http://www.w3.org/2000/01/rdf-schema#label.
Organisation
Looking through the raw data I can see that it’s not always filled out, and when it is it’s in an inconsistent manner. The context is also not fully clear and so I’m going to keep it within my domain for now and change the predicate to http://data.contoso.com/environment/ontology/associatedOrganisation - if it’s needed in the future we can clarify whether the organisations are the owners, managers or similar and update our data at a later date.
Borough_Ref and Borough
These look like some likely candidates to appear in a shared vocabulary, and yep - the OS Admin Geo Ontology comes back with a hit - both for Borough and London Borough*. However, the hits are classes rather than properties (more on this in an upcoming blogpost) so I don’t want to use those identifiers as predicates. As with Organisation, I’m going to tweak the default predicates very slightly to use the more common practise of writing property URIs using camel case: http://data.contoso.com/environment/ontology/boroughRef and http://data.contoso.com/environment/ontology/borough. As the Borough_Ref is a numerical value in the raw data I set the datatype for that column to whole number.
* Whilst outside the scope of this walkthrough, we would want to check that this is accurate based on the contents of the raw data, quite often a column heading will give the impression that all of its contents are, for example, London Boroughs, when in reality the data may be a mix of Wards, Boroughs and other administrative breakdowns of areas.
Location / SuppliedPostcode / NearestPostcode / Facilities / Grades / Comments
The rest of the columns I leave the predicates as they are (whilst tweaking into camel case). Location, Features, and Comments often contain text content in English e.g. “between the railway tracks north of Thayers Farm Road” so I’m going to set the data type to text and select UK English by using the typeahead language selector.
To summarise, we now have a set of predicates that looks like this:
| Column | Predicate | Data Type |
|---|---|---|
| GLA_ID (ID) | http://data.contoso.com/environment/ontology/GLA_ID ** | default |
| Borough_Ref | http://data.contoso.com/environment/ontology/boroughRef | Whole number |
| Name | http://www.w3.org/2000/01/rdf-schema#label | default |
| Location | http://data.contoso.com/environment/ontology/location | Text - English (United Kingdom) |
| SuppliedPostcode | http://data.contoso.com/environment/ontology/suppliedPostcode | default |
| NearestPostcode | http://data.contoso.com/environment/ontology/nearestPostcode | default |
| Borough | http://data.contoso.com/environment/ontology/borough | default |
| Organisation | http://data.contoso.com/environment/ontology/associatedOrganisation | default |
| Facilities | http://data.contoso.com/environment/ontology/facilities | Text - English (United Kingdom) |
| Grade | http://data.contoso.com/environment/ontology/grade | default |
| Comments | http://data.contoso.com/environment/ontology/comments | Text - English (United Kingdom) |
| Easting | http://data.ordnancesurvey.co.uk/ontology/spatialrelations/easting | Whole number |
| Northing | http://data.ordnancesurvey.co.uk/ontology/spatialrelations/northing | Whole number |
| Latitude | http://www.w3.org/2003/01/geo/wgs84_pos#lat | Decimal number |
| Longitude | http://www.w3.org/2003/01/geo/wgs84_pos#long | Decimal number |
** The column set as the ID will not be added as a property, so we don’t need to concern ourselves with this predicate. If you want to use it in the identifier and have it as a property in the raw data, do not select it as the primary ID - simply use its tag in the identifier template.
Convert!
That’s everything set up - all that’s left now is to hit the “Convert your CSV” button and let Level Up do its magic.
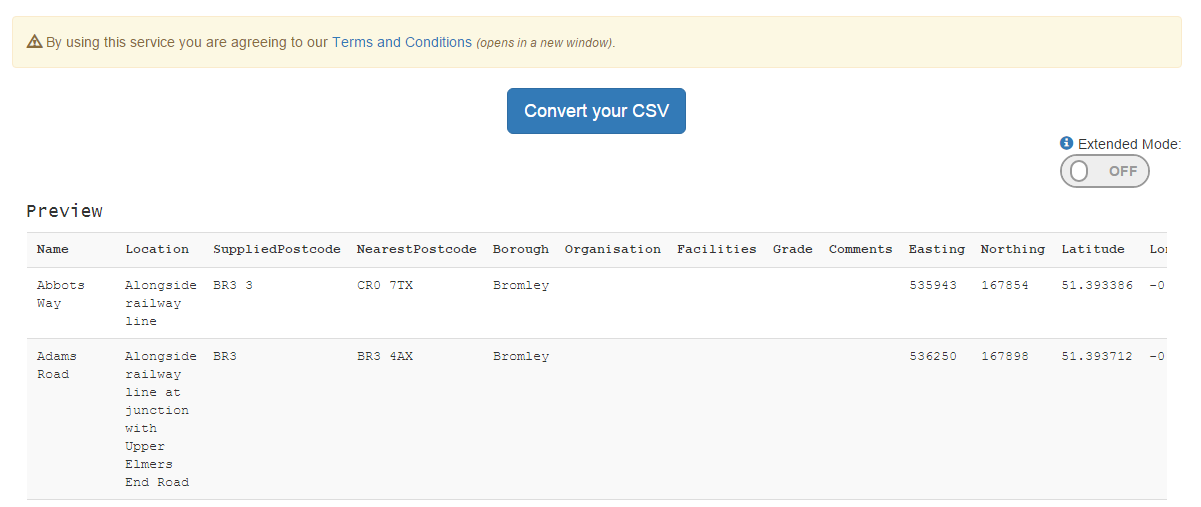
Bam! We can now download our data ->

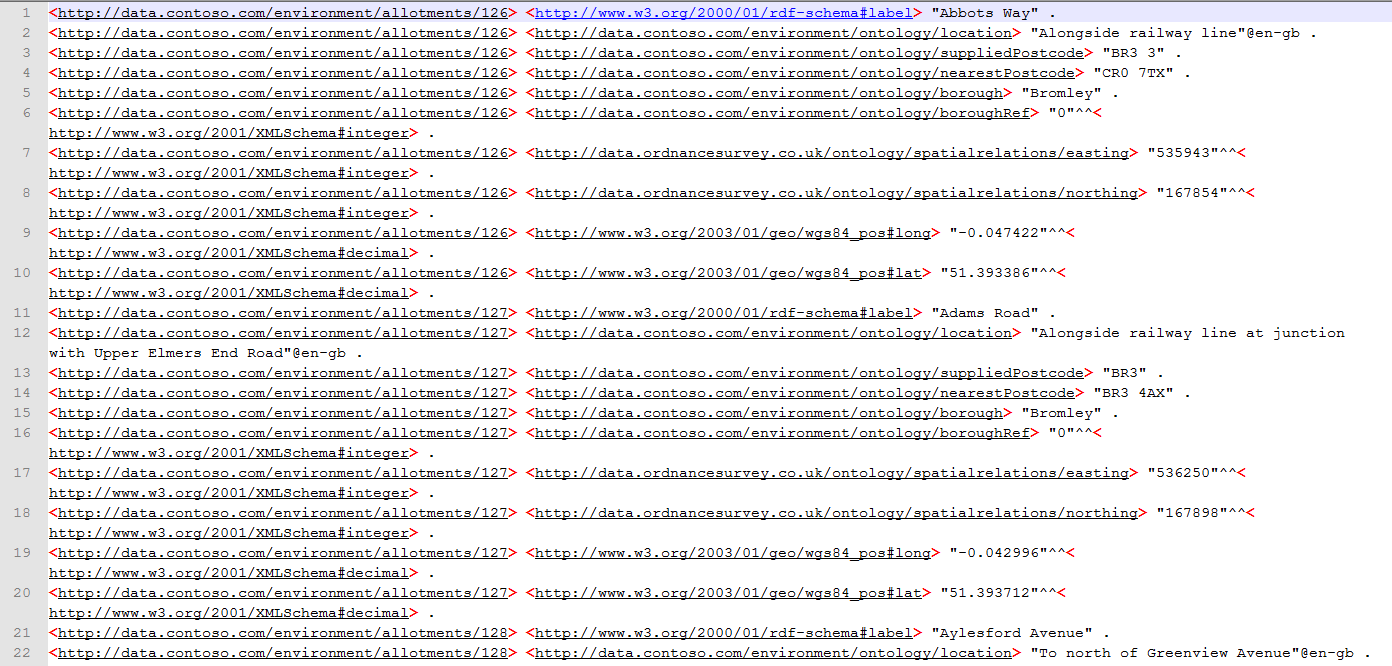
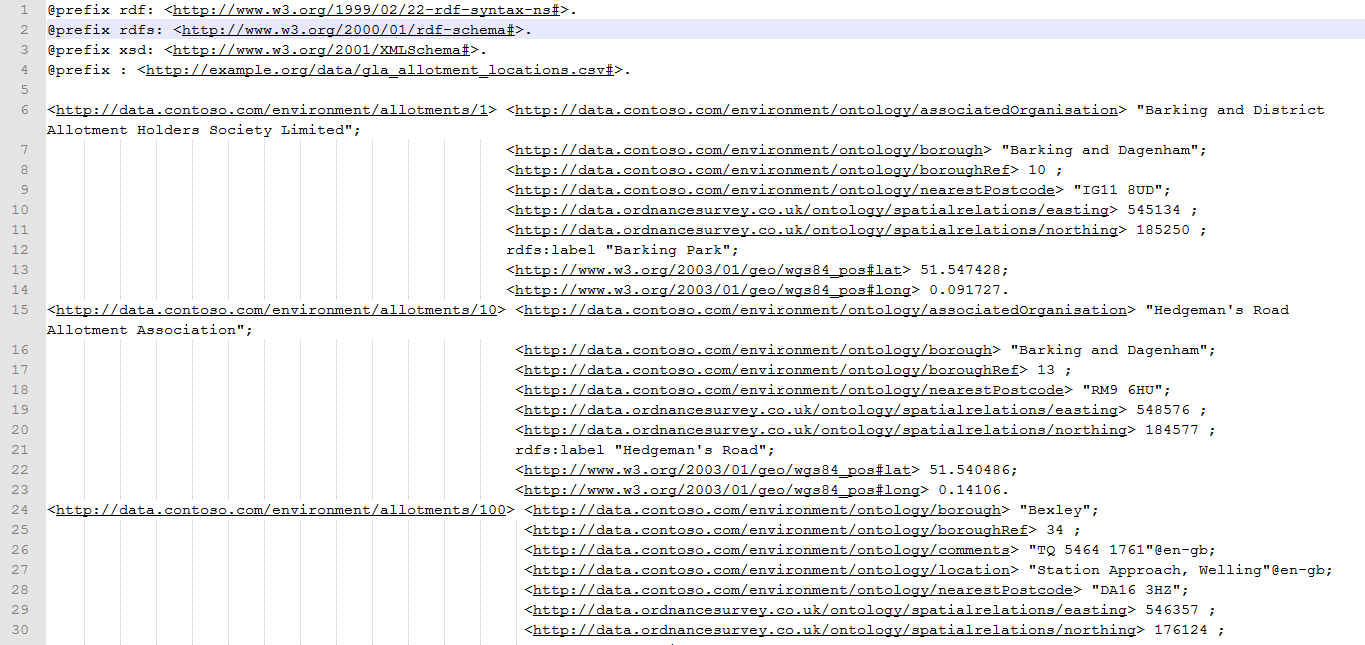
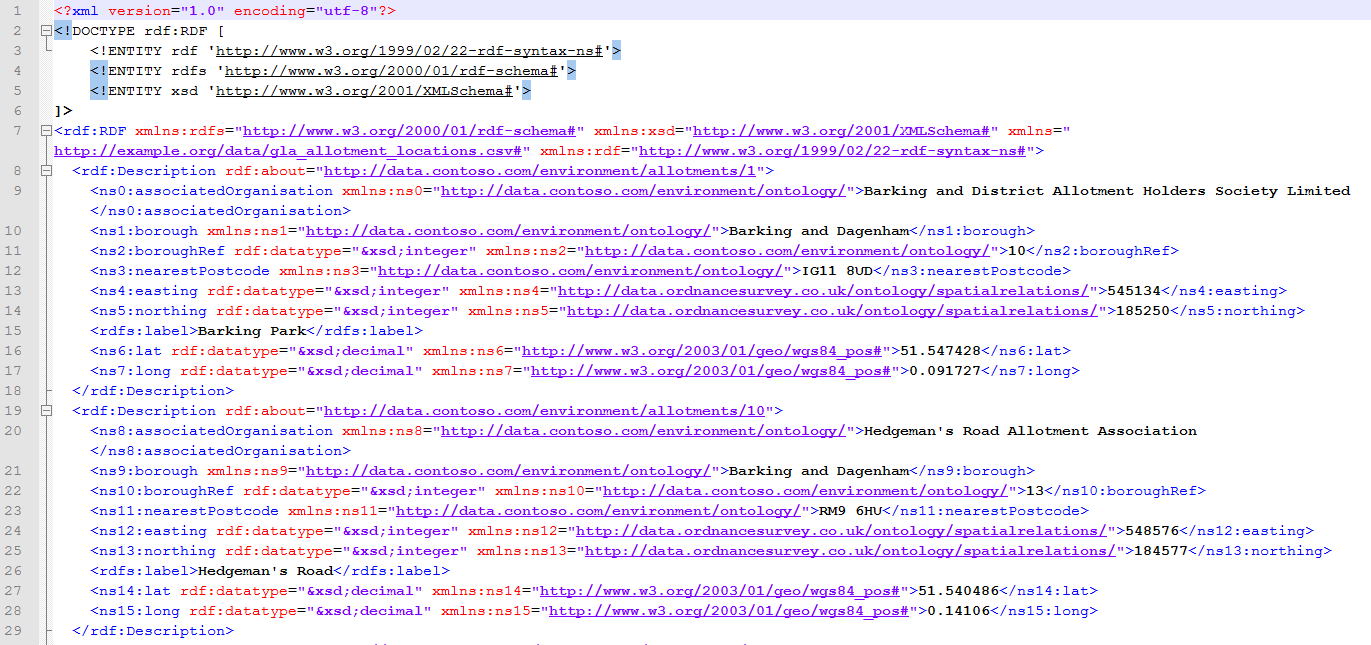
The downloaded zip file contains RDF in three different formats: N-Triples, Turtle and RDF-XML. Going into the various formats is outside the scope of this article, so here’s some segments of what to expect, plus a download of the zip file itself.
** N-Triples - .nt **
** Turtle - .ttl**
** RDF-XML - .rdf**
All done!
This article has guided you through the process of using Level Up to convert CSV into 4-star linked data. In a real world scenario, this would be one step in a project which would start by looking at your data and first mapping out your own vocabulary of predicates.
Level Up is in beta release so please do let us know if you have suggestions or feedback or a copy of the converter software to run in house (important if you are working with personal data).
Next in the series we’ll be taking a look at how to query linked data. Don’t forget we also run webinars and training throughout the year. See you next time!
This article is part of the Linked Data 101 series